OpenWrt on the ZTE MF282/MF282+/MF287/MF287+/MF287Pro (DreiTube/HuiTube and DreiNeo)
The ZTE MF282 aka 3 HuiTube / DreiTube and the ZTE MF287 series aka DreiNeo are both routers with integrated LTE modem, made exclusively for the network operator 3 in Austria. I ported OpenWrt to all devices of these series and found an easy-to-use unlocking method for them (with the exception of the MF282+).
Everything you do according to these instructions, you do on your own risk!
The following models are supported by OpenWrt 23.05 and onwards:
- MF282
- MF287
- MF287+
- MF287Pro
The only model that will not be backported is the MF282+ aka DreiTube.
ZTE MF282
The MF282 is supported by OpenWrt 23.05 onwards. In order to install it, you need to disassemble the device, attach serial console and perform a few commands in the UART shell.
Make sure to take a backup of your partitions. There is no firmware download available.
See the git commit at https://git.openwrt.org/?p=openwrt/openwrt.git;a=commit;h=590d1fd0e636f627bbfeb988909ec36cc5450a3b for installation instructions.
ZTE MF282+
This device has a completely different hardware. An OpenWrt port is available, but this device is not supported by OpenWrt 23.05. The modem is not Qualcomm-based but uses a Marvell PXA1827 module.
The MF282+ can be identified by the model type “DreiTube” on the bottom. It is IPQ4019 based (so quite powerful) and most instructions of the MF287 series applies, including exploits and installation instructions.
ZTE MF287
The newer MF287 series is more powerful than the MF282 and features four Gigabit-ports, a quad-core CPU and a CAT12 LTE modem. Since it can be had for less than €10,- used, it is a bargain! OpenWrt supports all models from 23.05 onwards.
Option 1: Install from OEM firmware
You need an exploit to get access to the stock firmware. Prepare the following:
Required files
- Static build of busybox for ARM, e.g. from https://busybox.net/downloads/binaries/1.21.1/ (Pick ARMV7 version)
- exploit.dat from https://cloud.aboehler.at/index.php/s/GDixspLf4jgg8pT. Please use the password
nzjmaBARoM - OpenWrt factory image - this is not listed in the table above. Please download it from https://firmware-selector.openwrt.org/
Then do the following preparatory steps:
- Set up a TFTP server - tftpd-hpa on Linux is tested, but tftpd32 should work as well
- Rename busybox to “telnetd” and put it to your TFTP root directory
- Put the OpenWrt factory.bin file to your TFTP directory as zte.bin
- Assign your computer the IP address 192.168.0.22
Now you can actually exploit the web interface and get access via Telnet.
- Log in to the web interface of your router, go to settings restore and use the file “exploit.dat” as the file to restore. Accept the message that the router is going to be restarted - don't worry, it won't restart.
- Watch your TFTP server serving the file “telnetd”
- Use a Telnet client and connect to 192.168.0.1 on port 10023
- You should be logged-in immediately, no need for a password
- Execute the following commands to take a backup and to install OpenWrt (NB: Instead of using tftp, you should also be able to use
scpfrom the router):
For the MF287 and MF287+, you need to replace mtdXX with mtd13 and mtdblockXX with mtdblock13!
For the MF287Pro, you need to replace mtdXX with mtd17 and mtdblockXX with mtdblock17!
Please double-check the partition number by running cat /proc/mtd and looking for the line named rootfs. Use this mtd number.
cd /tmp
cat /dev/ubi0_0 > /tmp/ubi0_0
cat /dev/ubi0_1 > /tmp/ubi0_1
tftp -p -l /tmp/ubi0_0 -r ubi0_0 192.168.0.22
tftp -p -l /tmp/ubi0_1 -r ubi0_1 192.168.0.22
rm /tmp/ubi0*
tftp -g -r zte.bin 192.168.0.22
cat /proc/driver/sensor_id
flash_erase /dev/mtdXX 0 0
dd if=zte.bin of=/dev/mtdblockXX bs=131072
reboot
After the Reboot, OpenWrt is installed!
Option 2: Install via serial console
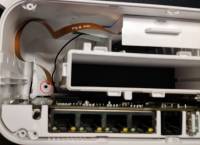
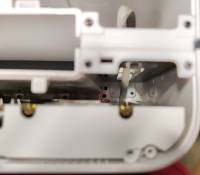
This method requires disassembly and serial access. The following pictures and instructions detail this process:
- Remove the battery cover and unscrew four screws at the bottom
- Remove the four white rubber covers on the back and remove the screws
- Pry open the back cover (where all the LAN ports are)
- Remove four screws; two can be seen on the top, two are at the bottom. Once they are removed, you can slide-out the main board
- Remove two more screws holding the antenna at the back in place
- Beneath the antenna, the UART pins can be found
- Connect serial console with 115200 8N1 and start a terminal program
Make sure to take a backup of your partitions. There is no firmware download available.
Restore stock
You need the two files ubi0_0 and ubi0_1 you downloaded during the installation of OpenWrt. If you are already running OpenWrt, you need to flash an initramfs version first - for this, simply install the -recovery.bin version using sysupgrade as usual.
Once rebooted, transfer the files ubi0_0 and ubi0_1 to your router to /tmp. Then, run the following commands to restore back to stock - the “ls” command is used to get the sizes of kernel and rootfs. Replace $kernel_length by the value you got for ubi0_0 and $rootfs_size by the value you got for ubi0_1.
Please double-check the partition number by running cat /proc/mtd and looking for the line named rootfs. Use this mtd number. For the MF287Pro, this should be ubiattach -m 17. For the MF287 and MF287+, this should be ubiattach -m 17.
ls -l /tmp/ubi0*
ubiattach -m XX
ubirmvol /dev/ubi0 -N kernel
ubirmvol /dev/ubi0 -N rootfs
ubirmvol /dev/ubi0 -N rootfs_data
ubimkvol /dev/ubi0 -N kernel -s $kernel_length
ubimkvol /dev/ubi0 -N ubi_rootfs -s $rootfs_size
ubiupdatevol /dev/ubi0_0 /tmp/ubi0_0
ubiupdatevol /dev/ubi0_1 /tmp/ubi0_1
reboot
The system should reboot into the stock firmware.
Carrier Unlock
Both devices are usually carrier-locked and as of the time of this writing no official unlocking methods exist: No website provides unlocking codes and the network operator refuses to unlock the device as well.
In order to reduce E-Waste, I describe a method that I found in some international online forums. To be fair, I was very sceptical to run random commands found in a forum on my device, but it worked flawlessly on one MF282 and two MF287+ devices.
The required software is an open source utility to interact with Qualcomm modem chipsets, available at https://github.com/forth32/qtools
Unlocking does not work on the MF282+ aka DreiTube! The LTE module uses a completely different hardware architecture.
Procedure
Option 1: Using OpenWrt and qtools
NB: If you are already running OpenWrt, you can skip disassembly and download the initramfs build. However, you will have to install “qcommand”, a static build will be available soon.
- Disassemble your device
- Download an OpenWrt initramfs build for your device that includes qtools from https://cloud.aboehler.at/index.php/s/GDixspLf4jgg8pT. Please use the password
nzjmaBARoM - Set up a TFTP service and put the initramfs file as “openwrt.bin” to your TFTP server
- Configure your network adapter to 192.168.1.100
- Attach a network cable and serial console and start a terminal program with 115200 8N1 settings
- Power the device and interrupt U-Boot by pressing a key when prompted
- Boot OpenWrt from RAM by running
setenv serverip 192.168.1.100
setenv ipaddr 192.168.1.1
tftpboot openwrt.bin
bootm
- After a few minutes, OpenWrt has started
- Continue with the unlocking section below.
Option 2: Stock firmware and static build of qtools
On the stock firmware, you can perform an unlock using the exploit described above for installing OpenWrt and use a static build of qtools:
- Perform the exploit and connect via telnet
- Download a static build of qcommand from https://www.lteforum.at/mobilfunk/dreineo-huitube-openwrt-und-carrier-unlock.21497/ (see attachments)
- Transfer the static build via telnet:
cd /tmp
tftp -g -r qcommand 192.168.0.22
chmod +x /tmp/qcommand
- Continue with the unlock as described below
Unlocking
Use the qcommand utility to perform the unlock. You might need to prefix the command with /tmp/ if you transferred the static utility to the stock firmware.
qcommand -e -c "c 27 40 1f 46 30 41 41"
qcommand -e -c "c 29 02 00"
- Wait a few minutes until the LTE modem has rebooted (On OpenWrt, you can watch the log by calling
logread -f. You will see a USB disconnect and later a USB connect; You could also watch the signal LEDs on the top for indications of a modem reboot). - Disconnect power
After the unlock, the modem does not register on the network by itself. Using AT commands at /dev/ttyUSB1, registration can be set to automatic mode and it will work (check the commands AT+ZSEC, AT+COPS, AT+CREG and AT+CFUN. I did something like (this is from memory, the order could be different and some commands are maybe not required):
AT+ZSEC?
AT+COPS?
AT+COPS=0,0,HoT
AT+CREG=1
AT+CFUN=1,1
The command AT+ZSEC? displays the state of the network lock. It should report ZSEC=3,0 if the unlocking process was successful.
On the stock firmware, it is sufficient to perform a manual network scan. Afterwards, it can be switched back to automatic.
More Details
Should you require more details for any of the steps provided, please have a look at the excellent documentation in the OpenWrt Wiki at https://openwrt.org. If you're still not getting along, then this procedure is not for you.
Exploit MF287 in detail
The settings file of the MF287 is obfuscated and encrypted. Fortunately, the algorithm isn't very complicated and could be easily decompiled using Ghidra. The following Python script creates the “exploit.dat” file as linked to above:


